Top Glass Ornaments for Teachers

Glass ornaments are a thoughtful and beautiful gift idea for teachers, as they can be displayed year-round or during the holiday season. Here are some top glass ornaments that would make perfect gifts for teachers:

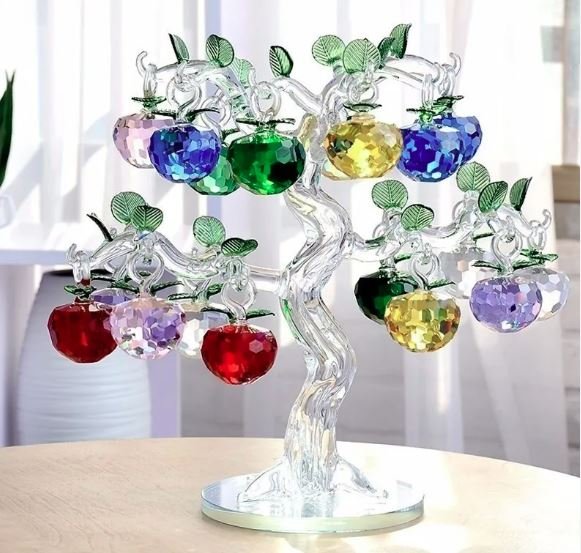
  1. Apple Ornament: A classic symbol of education, an apple ornament is a fitting and timeless choice to show appreciation to a teacher.
  2. Book Ornament: Celebrate the love of learning by gifting a glass book ornament. This can be personalized with the teacher’s name or a meaningful quote.
  3. Chalkboard Ornament: Reminiscent of a traditional classroom, a chalkboard ornament is a charming choice that captures the essence of teaching and learning.
  4. Pencil Ornament: Symbolizing knowledge and creativity, a glass pencil ornament is a playful and whimsical gift for any teacher.
  5. Globe Ornament: A globe ornament represents global awareness, curiosity, and the love of exploring diverse cultures and ideas.
  6. Owl Ornament: Owls are often associated with wisdom and knowledge, making an owl ornament a fitting tribute to a teacher’s guidance and expertise.
  7. Graduation Cap Ornament: A graduation cap ornament is a meaningful way to acknowledge a teacher’s dedication and the impact they have on their students’ educational journeys.
  8. School Bus Ornament: Capture the spirit of the school community with a glass school bus ornament, symbolizing the journeys teachers embark on with their students.
  9. Classroom Supplies Ornament: Consider gifting a glass ornament depicting classroom supplies like crayons, rulers, or scissors, representing the tools of a teacher’s trade.
  10. Personalized Message Ornament: Opt for a customizable glass ornament with a heartfelt message, such as “Best Teacher” or “Thank You for Making a Difference,” to make the gift truly unique and meaningful.

When selecting a glass ornament, aim for well-crafted and durable pieces that will last for years to come. These ornaments serve as heartfelt expressions of gratitude for teachers’ dedication to shaping young minds and deserve to be cherished and admired.

How to Create a Glass Ornament Wreath

Creating a glass ornament wreath is a wonderful way to add a festive and personalized touch to your home decor, especially during holidays like Christmas. Here’s a step-by-step guide on how to create your own glass ornament wreath:

Materials Needed:

  • Foam wreath form (available at craft stores)
  • Glass or plastic ornaments in various sizes and colors
  • Hot glue gun and glue sticks
  • Ribbon for hanging
  • Wire cutters (if needed)

Step-by-Step Instructions:

Prepare Your Work Area: Lay down newspaper or a crafting mat to protect your work surface.

Select and Arrange Ornaments:

Sort your ornaments by size and color to create a balanced look.

Choose a variety of sizes to add visual interest. Small ornaments can fill gaps, while larger ones will be focal points.

Remove any metal caps or hangers from the ornaments that may interfere with gluing.

Attach Ornaments to the Wreath Form:

Heat your glue gun and place a small dab of hot glue on the top of an ornament.

Press the ornament firmly onto the wreath form. Hold it in place for a few seconds until the glue sets.

Continue adding ornaments, working in rows or layers around the wreath form. Overlap them slightly to cover the foam completely.

Fill in Gaps:

Use smaller ornaments to fill in any gaps between larger ones. This will create a fuller and more cohesive look.

If needed, use wire cutters to trim ornament hangers or caps to fit better into tight spaces.

Create a Hanging Loop:

Cut a piece of ribbon to your desired length for hanging the wreath.

Form a loop and glue the ends together securely.

Attach the loop to the back of the wreath form with hot glue.

Secure and Adjust:

Once all ornaments are attached, go around the wreath and gently press any loose ornaments into the foam.

Adjust the arrangement as needed to ensure the wreath looks balanced and symmetrical.

Allow Glue to Fully Cure:

  • Let the wreath sit undisturbed for at least an hour to allow the hot glue to fully cure and set.
  1. Display Your Wreath:
  • Hang your beautiful glass ornament wreath on a door, wall, or above a mantel using the ribbon loop.
  • Avoid placing the wreath in direct sunlight or where it may be exposed to excessive heat to prevent damage to the ornaments.

Tips:

  • Experiment with different ornament shapes, colors, and finishes to match your decor theme.
  • Consider adding embellishments like glitter, ribbons, or faux greenery for a more festive look.
  • Start with larger ornaments and fill in with smaller ones to achieve a balanced design.
  • If using fragile glass ornaments, handle them carefully to avoid breakage during the crafting process.

Creating a glass ornament wreath allows you to unleash your creativity and personalize your holiday decor. Enjoy crafting and decorating with your unique creations!

The Best Crystal Ornaments for Stress Relief

Crystal ornaments can be a beautiful and calming addition to your space, promoting stress relief and positive energy. Here are a few popular crystals known for their stress-relieving properties:

Amethyst

A popular crystal known for its calming energy, amethyst can help to reduce stress, and anxiety, and promote relaxation. Place an amethyst cluster or amethyst geode in your space to benefit from its soothing vibrations.

Rose Quartz

It promotes self-care, emotional healing, and inner peace, making it a great choice for stress relief. You can use rose quartz hearts or palm stones as ornaments for a calming touch.

Lepidolite

This crystal contains high levels of lithium, which is known for its calming and balancing properties. Lepidolite can help ease stress, and anxiety, and promote relaxation. Consider placing lepidolite tumbled stones or a lepidolite crystal ball in your space for its soothing effects.

Clear Quartz

Known as the “master healer,” clear quartz is a versatile crystal that can amplify positive energy and help to relieve stress. Its clear and pure energy can uplift your environment and promote a sense of calmness. Clear quartz points or clusters make beautiful stress-relieving ornaments.

Blue Lace Agate

This crystal helps to promote relaxation, reduce anxiety, and bring a sense of tranquillity.

Citrine

It carries bright and vibrant energy that can uplift your mood and help to relieve stress. Place a citrine crystal cluster or citrine tumbled stones in your space to promote positivity and stress relief.

Remember, it’s important to choose crystals that resonate with you. You can explore these crystals and observe how their energy affects you. Whether you opt for clusters, palm stones, or other ornamental shapes, the presence of these crystals can create a calming and stress-relieving atmosphere in your space.

How to Create a Glass Ornament Sun Catcher

Creating glass ornament sun catchers can be a fun and creative craft project to brighten up your space. Here’s a step-by-step guide on how to make your own glass ornament sun catcher:

Materials Needed:

– Clear glass ornaments (with removable tops)

– Acrylic craft paint in various colors

– Paintbrushes

– Glitter (optional)

– Clear drying glue

– Ribbon or string for hanging

– Newspaper or protective surface

Steps:

  1. Prepare your workspace: Lay down some newspaper or a protective surface to catch any paint or glitter spills.
  2. Remove the top: Carefully remove the metal or plastic top of the glass ornament. Set it aside; you’ll reattach it later.
  3. Paint the ornament: Choose your desired colors of acrylic craft paint. Use a paintbrush to apply the paint to the inside of the glass ornament. You can create simple designs, swirls, or even paint an intricate scene. Experiment with layering colors and adding glitter to achieve your desired effect. Tip: If you make a mistake or aren’t happy with the painted design, wait for the paint to dry and easily wipe it off with a cotton swab or cloth.
  4. Let it dry: Place the painted glass ornament upside down on the protective surface and let it dry according to the instructions on the paint bottle. This will ensure that the paint sets properly.
  5. Add additional details (optional): Once the initial paint is dry, you can add extra details or accents with smaller brushes or different colors of paint. This can include dots, patterns, or any other design elements you wish to incorporate.
  6. Apply glue (optional): If you want to add extra sparkle to your sun catcher, apply a thin layer of clear drying glue to specific areas of the ornament and sprinkle glitter over them. Allow the glue to dry completely.
  7. Reattach the top: Once the paint and any additional details are fully dry, reattach the metal or plastic top to the glass ornament. Ensure it is secured tightly.
  8. Attach a hanger: Cut a length of ribbon or string and create a loop by tying the ends together. Attach it to the metal or plastic top of the ornament, creating a loop to hang your sun catcher.
  9. Hang and enjoy: Find a window or any other sunny spot in your home and hang your beautiful glass ornament sun catcher. The sunlight will illuminate the colors and designs, creating a stunning visual display.

Remember to experiment with different color combinations, painting techniques, and designs to create unique and personalized glass ornament sun catchers. Enjoy the process and admire your handmade sun catchers as they add a touch of charm and color to your living space.

Top Glass Ornaments for Musicians

If you’re looking for glass ornaments specifically designed for musicians, here are some popular options that make great decorations for music enthusiasts or as gifts:

  1. Glass Saxophone Ornament: A miniature saxophone crafted out of glass, featuring intricate detailing and vibrant colors, perfect for jazz lovers and saxophone players.
  2. Glass Piano Ornament: A delicate glass replica of a grand piano, complete with keys, strings, and pedals, ideal for piano players and lovers of classical music.
  3. Glass Violin Ornament: A beautifully crafted glass violin ornament that captures the elegance and beauty of this classical instrument, appealing to violinists and fans of classical music.
  4. Glass Guitar Ornament: A detailed glass guitar ornament in various styles, such as acoustic or electric, customized with fine details and strings, appealing to guitarists and music enthusiasts.
  5. Glass Drum Set Ornament: A miniature glass drum set ornament with intricate detailing, capturing the essence of a drum kit, perfect for drummers and fans of percussive music.
  6. Glass Music Note Ornaments: Glass ornaments in the shape of music notes, such as treble clefs, quavers, or eighth notes, representing the universal language of music, ideal for musicians of all kinds.
  7. Glass Trumpet Ornament: A thoughtfully crafted glass trumpet ornament, showcasing the beauty and elegance of this brass instrument, ideal for trumpet players and fans of jazz or orchestral music.
  8. Glass Microphone Ornament: A miniature glass microphone ornament, complete with intricate detailing, perfect for singers, vocalists, or fans of music performance.
  9. Glass Music Stand Ornament: A miniature glass replica of a music stand, adorned with sheet music, a perfect symbol of the dedication and love for music, great for any musician.
  10. Glass Musical Instrument Set: A set of assorted glass ornaments representing various musical instruments like trumpet, saxophone, guitar, violin, and piano, providing a comprehensive musical theme for your tree or as a set gift.

These glass ornaments are beautiful additions to any Christmas tree or decorative display, showcasing the passion for music and adding a touch of artistry to the holiday season.

The Best Crystal Ornaments for Bedrooms

Decorating a bedroom with crystal ornaments can add a touch of elegance and positive energy to your personal space. Here are some beautiful crystal ornaments that you may consider for your bedroom:

  1. Crystal Suncatchers: These hanging crystals catch sunlight and create stunning refractions of light, adding sparkle and enchantment to your bedroom. Hang them near windows or light sources for maximum effect.
  2. Crystal Healing Stones: Select crystals known for their soothing and calming properties, such as amethyst, rose quartz, or clear quartz. Place them on your nightstand or dresser to create a harmonious and serene atmosphere.
  3. Crystal Candle Holders: Opt for crystal candle holders to bring a radiant glow and ambiance into your bedroom. Crystal candle holders can make the perfect centerpiece on your bedside table or dresser, infusing your space with a serene and cozy feel.
  4. Crystal Mobiles: Hang delicate crystal mobiles from your ceiling or near a window to add movement and elegance to your bedroom. The gentle sway of the crystals can create a serene and calming effect, enhancing your relaxation time.
  5. Crystal Geodes: Display beautiful crystal geodes on your shelves or nightstand to add a touch of natural texture and elegance to your bedroom decor. They can create a focal point, radiating positive energy and serving as a reminder of the beauty found in nature.
  6. Crystal Pendants: Hang or display crystal pendants, such as prism or faceted crystal balls, near a light source to create a dazzling display of light and color in your bedroom. They can bring a sense of magic and enchantment to your space.
  7. Crystal Wind Chimes: Hang crystal wind chimes near your window or at your bedroom entrance to create a melodious tinkling sound. The gentle chiming paired with the aesthetic beauty of the crystals can promote relaxation and tranquility.

Remember to choose crystals or crystal ornaments that resonate with you personally, as different crystals are believed to possess various metaphysical properties. Use them as decorative elements that enhance the overall ambiance and positive energy in your bedroom.

How to Make Glass Ornaments with Yarn

Creating glass ornaments with yarn is a delightful way to combine the elegance of glass with the cozy, handmade feel of yarn. This project is perfect for adding a personal touch to your holiday decorations or for giving as thoughtful gifts. Here’s a step-by-step guide to making your own beautiful glass ornaments with yarn.

Materials Needed:

  • Clear glass ornaments (ball or flat disc shape)
  • Yarn in various colors and textures
  • Scissors
  • Craft glue or glue gun
  • Tweezers or a small hook (optional)
  • Glitter, sequins, or small embellishments (optional)

Instructions:

Prepare Your Workspace:

Lay down some newspaper or a craft mat to protect your working surface from glue and yarn scraps.

Gather all your materials so they’re within easy reach.

Choose Your Yarn:

Select yarn colors and textures that complement your theme or color scheme. Consider using a mix of thin and thick yarns for added visual interest.

Cut the Yarn:

Cut the yarn into manageable lengths, about 6-8 inches each. This makes it easier to work with inside the ornament.

Open the Ornament:

Carefully remove the metal cap from the glass ornament. Set it aside in a safe place.

Insert the Yarn:

Start inserting the yarn pieces into the ornament. You can use your fingers, tweezers, or a small hook to help position the yarn inside the ornament.

Mix and match different colors and textures of yarn as you fill the ornament to create a visually appealing design.

Continue adding yarn until the ornament is filled to your desired level. Be sure to leave enough space for the cap to fit back on.

Add Embellishments (Optional):

If you want to add a bit of sparkle, pour a small amount of glitter, sequins, or other tiny embellishments into the ornament. These will settle among the yarn and catch the light beautifully.

Secure the Yarn:

Once the ornament is filled, use a small amount of craft glue or a glue gun to secure the ends of the yarn near the opening. This will help keep the yarn in place when you replace the cap.

Replace the Cap:

Carefully place the metal cap back onto the ornament. Ensure it is securely fastened.

Decorate the Outside (Optional):

If desired, you can wrap yarn around the outside of the ornament. Apply a thin line of glue and wrap the yarn around the top or bottom of the ornament for an added decorative touch.

Hang and Enjoy:

Attach a ribbon or hook to the top of the ornament, and it’s ready to hang on your tree or display.

Tips and Ideas:

  • Color Themes: Choose yarn colors that match your holiday decor or a specific theme, such as winter wonderland (white, silver, blue) or rustic (earth tones, greens, reds).
  • Personalization: Add small tags or charms to the ornament hanger for a personalized touch.
  • Gifting: These handmade ornaments make lovely gifts. Consider making a set and presenting them in a decorative box.

Conclusion

Making glass ornaments with yarn is a simple yet creative project that results in beautiful, personalized decorations. Whether you’re crafting for the holidays or simply looking for a fun DIY project, these yarn-filled glass ornaments are sure to bring a touch of warmth and charm to your home. Enjoy the process of creating and experimenting with different yarns and embellishments to make each ornament uniquely your own.

Top Glass Ornaments for Travelers

For travellers who love to collect mementoes from their journeys, glass ornaments can be a beautiful way to commemorate their adventures. Here are some top glass ornaments that are perfect for travellers:

Eiffel Tower Ornament

A delicate glass ornament featuring the iconic Eiffel Tower is a lovely reminder of a trip to Paris, France.

Statue of Liberty Ornament

Celebrate a visit to New York City with a glass ornament depicting the Statue of Liberty, a symbol of freedom and a famous landmark.

Big Ben Ornament

Pay homage to a trip to London, England, with a glass ornament showcasing the iconic Big Ben clock tower.

Colosseum Ornament

Commemorate a journey to Rome, Italy, with a glass ornament depicting the majestic Colosseum, a symbol of ancient Roman history.

Sydney Opera House Ornament

Remember a trip Down Under with a glass ornament showcasing the world-renowned Sydney Opera House, an architectural marvel.

Taj Mahal Ornament

A glass ornament featuring the Taj Mahal is a beautiful way to remember a visit to this breathtaking monument in Agra, India.

Great Wall of China Ornament

Celebrate an exploration of the Great Wall of China with a glass ornament depicting this magnificent UNESCO World Heritage Site.

Mount Fuji Ornament

A glass ornament showcasing the majestic Mount Fuji is a wonderful keepsake for travellers who have experienced the beauty of Japan.

Christ the Redeemer Ornament

Remember a journey to Rio de Janeiro, Brazil, with a glass ornament featuring the iconic Christ the Redeemer statue.

Golden Gate Bridge Ornament

Commemorate a trip to San Francisco, California, with a glass ornament representing the iconic Golden Gate Bridge, a symbol of the city.

These delicate glass ornaments not only capture the essence of these famous landmarks but also serve as treasured reminders of the memories and adventures experienced while traveling. Choose an ornament that resonates with your travel experiences and create a beautiful display to bring back those cherished memories.

The Best Crystal Ornaments for Baby Nurseries

Crystal ornaments for baby nurseries can be a beautiful addition to a baby nursery, providing a touch of elegance and sparkle. Here are some crystal ornament ideas that can add a whimsical and enchanting atmosphere to the space:

Crystal Mobile:

Hang a crystal mobile above the crib, with delicate crystals suspended from strings or a metal frame. As the mobile gently rotates, it will catch and reflect light, creating a mesmerizing display for your little one.

Crystal Prism Suncatchers:

Hang crystal prism suncatchers near the windows, where sunlight can hit them and scatter colorful rays throughout the room. They create a magical ambiance as the light dances off the crystals.

Crystal Fairy Figurines:

Decorate shelves or tabletops with small crystal fairy figurines. These delicate and enchanting pieces can add a touch of whimsy and imagination to the nursery.

Crystal Night Light:

Choose a night light with a crystal base or a crystal shade. When lit, the crystal will emit a soft and soothing glow that creates a calming atmosphere for your baby’s sleep.

Crystal Wall Decals:

Consider using crystal-inspired wall decals with intricate designs. These decals can add a touch of elegance and sparkle to the nursery, creating a captivating focal point or accent on the walls.

Crystal Bookends: Use crystal bookends to display a collection of favorite children’s books. The crystal will not only keep the books organized but also add a touch of sophistication to the nursery decor.

Crystal Prism Mobile: Hang a crystal prism mobile composed of several crystal prisms suspended at different lengths. When hit by sunlight or artificial light, these prisms will scatter beautiful rainbows around the room, captivating your baby’s attention.

Crystal Growth Tree: Choose a crystal growth tree that allows you to grow crystals on its branches. These decorative trees provide an interactive element and can be a source of fascination and wonder for older children.

Remember, when selecting crystal ornaments for a baby nurseries, it’s essential to prioritize safety. Ensure that any hanging ornaments are securely fastened, out of reach from the baby, and follow the manufacturer’s guidelines for age appropriateness. With the right precautions in place, crystal ornaments can create an enchanting and magical environment in your baby’s nursery.

How to Make Glass Ornaments with Wire

Creating glass ornaments with wire is a fun and creative way to make unique decorations for your home or special occasions. This guide will walk you through the process step-by-step, ensuring you end up with beautiful and personalized glass ornaments.

Materials Needed:

  • Glass beads or small glass ornaments
  • Craft wire (20-24 gauge is ideal)
  • Wire cutters
  • Round-nose pliers
  • Flat-nose pliers
  • Ribbon or string for hanging

Step-by-Step Instructions:

Choose Your Glass Beads or Ornaments:

Select the glass beads or small glass ornaments you want to use. They can be clear, colored, or a mix of both, depending on the look you want to achieve.

Cut the Wire: Using wire cutters, cut a piece of wire approximately 10-12 inches long. The length of the wire will depend on the size of your beads and the design you have in mind.

Create a Loop for Hanging:

Using the round-nose pliers, create a small loop at one end of the wire. This loop will be used to hang your ornament later. Twist the wire around itself to secure the loop, and use flat-nose pliers to flatten and secure the twist.

Thread the Beads:

Start threading your glass beads onto the wire. You can create patterns or mix different sizes and colors for a more intricate design. Leave about 2 inches of wire free at the end for finishing.

Secure the Beads:

Once all the beads are threaded, use the round-nose pliers to create another loop at the end of the wire, similar to the first loop. Wrap the remaining wire around itself to secure the beads in place. Cut off any excess wire with the wire cutters and flatten the end with flat-nose pliers.

Shape the Ornament:

Shape the beaded wire into your desired ornament shape. Popular shapes include stars, hearts, and circles, but you can get creative and design any shape you like. Use your fingers and pliers to bend and mold the wire gently.

Add a Hanging Ribbon: Cut a piece of ribbon or string to your desired length. Thread it through one of the loops and tie a knot at the end to create a hanger for your ornament.

Finishing Touches: Inspect your ornament for any sharp wire ends or loose beads. Adjust and tighten as needed to ensure everything is secure.

Optional – Add Extra Embellishments: You can add additional decorative elements such as small charms, glitter, or tiny bells to enhance your glass ornament. Simply thread or attach them to the wire before securing the final loop.

Tips:

  • Use a variety of bead shapes and sizes to create texture and interest.
  • If you’re new to wire wrapping, practice making loops and bends with scrap wire before starting your project.
  • Consider using colored wire for a more vibrant and festive look.
  • Be mindful of the weight of your beads; heavier beads may require thicker wire for support.

Conclusion:

Creating glass ornaments with wire is a delightful and rewarding craft that allows for endless creativity. These handmade ornaments can be used to decorate your home, given as gifts, or even sold at craft fairs. With some basic materials and a bit of practice, you’ll be able to make beautiful and unique glass ornaments that reflect your personal style and creativity.