The Benefits of Crystal Ornaments in Attics

Crystal ornaments can bring several benefits when used in attics. Here are a few advantages to consider:
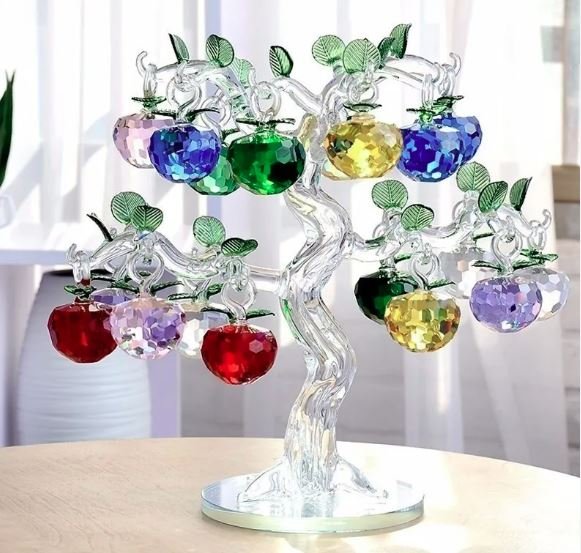
Aesthetics:

Crystal ornaments popularity comes from their beauty and elegance. By incorporating them into an attic space, they can add a touch of sophistication and visual appeal. The sparkle and reflections created by crystal can create a stunning ambiance, enhancing the overall aesthetic of the attic.

Light Reflection:

Crystal is prized for its ability to scatter and refract light. Placing crystal ornaments strategically in the attic can help maximize natural light that enters the space, making it brighter and more inviting. This can be particularly beneficial if the attic has limited windows or natural light sources.

Energy Clearing:

In some spiritual beliefs, crystal ornaments are thought to possess energy-clearing properties. There is belief that crystals can absorb and transmute negative energies, promoting a sense of calm and balance in the space. This can be especially useful if the attic has been in use for storage and requires a refreshing and cleansing atmosphere.

Feng Shui:

In Feng Shui, a traditional Chinese practice of creating harmonious environments, crystals carry with them a belief that they bring positive energy and balance to a space. Placing crystal ornaments strategically in the attic according to Feng Shui principles can help promote flow, harmony, and a positive atmosphere.

Inspiration and Creativity:

Crystal ornaments can serve as artistic and decorative elements that inspire and promote creativity. The beauty and shimmer of crystals can spark imagination and ignite artistic endeavors, making the attic an ideal space for creative pursuits such as writing, painting, or crafting.

Conversation Starters:

Crystal ornaments can be great conversation starters, particularly if they have unique shapes or historical significance. Having a collection of crystals or antique crystal ornaments in the attic can be an interesting point of discussion. It is a way to engage visitors in conversations about art, history, or personal stories related to the crystals.

While incorporating crystal ornaments into an attic can provide aesthetic and spiritual benefits. It’s important to consider personal preferences, individual beliefs, and the desired atmosphere of the space. Ultimately, the choice to include crystal ornaments in an attic should align with your own style, taste, and intentions for the space.

How to Create a Glass Ornament Lamp

Creating a glass ornament lamp can be a creative and rewarding project. Here’s a basic guide to help you get started:

Materials Needed

Glass Ornaments

Choose a variety of glass ornaments in different sizes and colours. These will form the decorative elements of your lamp.

Lamp Base

Select a lamp base that complements the size and style of your glass ornaments. You can use an existing lamp base or purchase a new one that fits your design vision.

Lampshade

Decide on a lampshade style that will harmonize with your glass ornaments and lamp base.

Lamp Kit

Ensure you have a lamp kit that includes a socket, cord and plug. You can find these kits at hardware stores or online.

Light Bulb

Choose an appropriate light bulb for your lamp base. Consider the wattage and type of bulb that will provide the desired lighting effect.

Adhesive

Use a strong adhesive suitable for glass and metal surfaces. Epoxy glue or a clear adhesive like E6000 works well for attaching glass ornaments securely.

Optional: Decorative Accents

You may want to add additional decorative accents such as ribbons, beads, or other embellishments to personalize your lamp.

Steps to Create a Glass Ornament Lamp:

Prepare the Lamp Base

Clean the lamp base thoroughly to remove any dust or residue.

If necessary, disassemble the lamp base to make it easier to work with.

Arrange Glass Ornaments

Lay out your glass ornaments and plan the design. Consider the placement and spacing of ornaments around the lamp base.

Attach Glass Ornaments

Apply a small amount of adhesive to the base of each glass ornament. Carefully press each ornament onto the lamp base in the desired position.

Allow the adhesive to dry according to the manufacturer’s instructions to ensure a secure bond.

Assemble the Lamp

Once the ornaments are securely attached and the adhesive has dried, reassemble the lamp base if it was disassembled.

Attach the lampshade to the lamp base, following the manufacturer’s instructions for the lamp kit.

Install the Lamp Kit

Thread the lamp cord through the lamp base and secure it according to the lamp kit instructions.

Install the socket and insert the light bulb into the socket.

Test the Lamp

Plug in the lamp and test it to ensure that it is working properly.

Adjust the lampshade and position the lamp to achieve the desired lighting effect.

Finishing Touches

Once the lamp is assembled and tested, make any final adjustments to the glass ornaments or lampshade.

Add any decorative accents or embellishments if desired.

Display and Enjoy

Place your glass ornament lamp in a suitable location where it can be admired and appreciated.

Enjoy the warm glow and artistic beauty of your handmade glass ornament lamp!

Creating a glass ornament lamp allows you to combine creativity with practicality, resulting in a unique and personalized lighting fixture that adds charm and elegance to any space. Adjust the design and materials to suit your preferences and style, and have fun experimenting with different combinations of glass ornaments to create a one-of-a-kind piece.

How to Make Glass Ornaments with Resin

Making glass ornaments with resin can be a creative and rewarding craft project. Here’s a step-by-step guide on how to make glass ornaments with resin:

Materials Needed

  1. Clear Glass Ornaments: These can be purchased from craft stores and come in various shapes and sizes.
  2. Epoxy Resin: Choose a clear epoxy resin designed for crafts. Ensure it’s suitable for use with glass.
  3. Resin Pigments or Dyes: Optional, for adding color to the resin.
  4. Mixing Cups and Stirring Sticks: Disposable cups and wooden or plastic sticks for mixing resin.
  5. Disposable Gloves: To protect your hands from resin.
  6. Crafting Tape: Optional, for masking off areas or creating designs.
  7. Glitter or Decorative Elements: Optional, for adding sparkle or texture to your ornaments.
  8. Silicone Mold Release Spray: If using molds for resin shapes.

Step-by-Step Instructions

Prepare Your Work Area

Cover your work surface with a plastic tablecloth or wax paper to protect it from resin spills. Ensure good ventilation in your workspace.

Prepare the Resin

Follow the instructions on your epoxy resin kit for mixing ratios. Typically, epoxy resin requires mixing resin and hardener in equal parts. Use disposable cups and stir the resin mixture thoroughly but gently to avoid creating bubbles.

Add Color (Optional)

If you want coloured ornaments, add resin pigments or dyes to the resin mixture. Mix until the colour is evenly distributed.

Prepare the Glass Ornaments

Remove the metal caps or tops from the glass ornaments. You can tape off the tops if you want to keep them clear of resin.

Pour Resin into Ornaments

Carefully pour the resin mixture into the glass ornaments. You can pour directly from the mixing cup or use a small funnel for precision.

Add Decorative Elements (Optional)

If desired, drop in glitter, tiny beads, or small charms into the resin-filled ornaments to create decorative effects. Use a toothpick or skewer to position them as desired.

Remove Air Bubbles

Use a heat gun or a kitchen torch to gently pass over the surface of the resin-filled ornaments to remove any bubbles. Be careful not to overheat or touch the resin directly with the flame.

Cure the Resin

Place the ornaments on a flat surface in a dust-free area and allow them to cure as per the resin manufacturer’s instructions. This typically involves letting them cure for 24-48 hours at room temperature.

Reattach Tops

Once the resin has fully cured and hardened, reattach the metal caps or tops to the glass ornaments.

Clean Up

Clean your tools and work area with isopropyl alcohol to remove any resin residue.

Optional Finishing

If desired, you can add a clear coat of resin over the entire ornament to give it a glossy finish and added durability.

Tips

  • Work in Small Batches: Epoxy resin has a limited working time, so mix and pour in small batches to avoid wastage.
  • Experiment with Designs: Use masking tape or create patterns with resin layers to achieve different effects.
  • Safety: Wear gloves and work in a well-ventilated area when working with resin.

Making glass ornaments with resin allows for endless creative possibilities, from personalized gifts to unique decorations for holidays and special occasions. Enjoy the process of creating beautiful, custom ornaments with this versatile crafting technique!

The Best Crystal Ornaments for Relaxation

Choosing crystal ornaments for relaxation can enhance your space with their calming qualities and aesthetic appeal. Here are some options that promote relaxation and tranquility:

Amethyst Crystal Ornaments:

Known for its soothing energy and ability to promote peace of mind, amethyst crystal ornaments are ideal for creating a serene atmosphere.

Rose Quartz Crystal Ornaments:

Rose quartz is associated with love and harmony. Using rose quartz crystal ornaments can help create a calming and gentle energy in your environment.

Clear Quartz Crystal Ornaments:

Clear quartz is a versatile crystal that enhances clarity and balance. It can promote a sense of calmness and purification in your space.

Selenite Crystal Ornaments:

Selenite is valued for its calming and purifying properties. Its soft, luminous appearance can create a serene ambiance in any room.

Blue Lace Agate Crystal Ornaments:

Blue lace agate is known for its calming and soothing effects. Its gentle energy can help reduce stress and promote relaxation.

Lepidolite Crystal Ornaments:

Lepidolite contains lithium, which is known for its calming properties. Using lepidolite crystal ornaments can help alleviate anxiety and promote relaxation.

Ocean Jasper Crystal Ornaments:

Ocean jasper is associated with tranquility and relaxation. Its unique patterns and soothing colors can create a peaceful atmosphere.

Howlite Crystal Ornaments:

Howlite is known for its calming energy and ability to reduce stress. Using howlite crystal ornaments can promote a sense of relaxation and emotional balance.

Celestite Crystal Ornaments:

Celestite is often called the “stone of heavenly communication” and is associated with peace and tranquility. Its gentle energy can promote relaxation and a sense of serenity.

Green Aventurine Crystal Ornaments:

Green aventurine is believed to be a stone of luck and opportunity, but it also has a calming effect on emotions. Its soothing energy can create a relaxing environment.

When choosing crystal ornaments for relaxation, consider placing them in areas where you spend time relaxing or meditating, such as your bedroom, living room, or meditation space. Their natural beauty and calming properties can contribute to a more peaceful and harmonious atmosphere in your home.

The Most Cheerful Glass Ornaments for Birthdays

Choosing cheerful glass ornaments for birthdays can add a festive and celebratory touch to any party or birthday decor. Here are some ideas for the most cheerful glass ornaments suitable for birthdays:

Colourful Balloons

Glass ornaments shaped like balloons in vibrant colours such as red, blue, yellow, and green can bring a lively and festive atmosphere to birthday celebrations.

Cake Ornaments

Glass ornaments designed to resemble birthday cakes with candles can symbolize the joy and sweetness of celebrating another year.

Party Hats

Glass ornaments shaped like party hats in bright colours like pink, purple, or silver can evoke the spirit of fun and celebration.

Gift Boxes

Glass ornaments that look like gift boxes with bows and ribbons are perfect for celebrating birthdays and adding a touch of excitement.

Number Ornaments

Customized glass ornaments shaped like numbers to represent the age being celebrated can be a unique and personal addition to birthday decorations.

Confetti Ornaments

Glass ornaments filled with colourful confetti or sequins inside can capture the festive and joyful essence of birthdays.

Cupcake Ornaments

Glass ornaments designed as cupcakes with frosting and sprinkles can add a whimsical and delightful touch to birthday decor.

Sparkling Stars

Glass ornaments shaped like stars in glittery or metallic finishes can symbolize the magic and sparkle of birthdays.

Rainbow Ornaments

Glass ornaments featuring rainbow colours or designs can represent happiness, positivity, and the celebration of life.

Personalized Ornaments

Glass ornaments that can be personalized with the name or initials of the birthday person can make them feel special and cherished on their special day.

Tips for Using Cheerful Glass Ornaments for Birthdays

  • Mix and Match: Combine different types of cheerful glass ornaments to create a festive and colourful birthday display.
  • Hang Them Up: Use ribbons or hooks to hang glass ornaments from birthday banners, chandeliers, or branches for a whimsical look.
  • Table Centerpieces: Arrange glass ornaments as part of table centrepieces or scatter them around the party area for added charm.
  • Keepsakes: After the party, glass ornaments can serve as keepsakes or gifts for guests to remember the celebration.

By incorporating these cheerful glass ornaments into birthday decorations, you can create a joyful and memorable atmosphere that celebrates the special day in style.

The Best Crystal Ornaments for Calmness

For promoting calmness and a serene atmosphere, choosing the right crystal ornaments can add a touch of tranquillity to any space. Discover some of the best crystal ornaments known for their calming properties.

Amethyst

Known for its soothing energy, amethyst promotes relaxation and stress relief. Its purple hues are calming and help create a peaceful environment.

Rose Quartz

This gentle pink crystal is associated with love and emotional healing. It promotes harmony and tranquillity, making it ideal for calming spaces.

Clear Quartz

A versatile crystal known for its clarity and amplifying properties. It can enhance calmness by clearing negative energies and promoting balance.

Blue Lace Agate

This light blue crystal has a calming and uplifting energy. It helps to soothe emotions and reduce anxiety, promoting a sense of peace.

Celestite

Known as the “stone of angels,” celestite has a gentle, uplifting energy that promotes relaxation and tranquillity. 

Lepidolite

This lilac-coloured crystal is known for its calming and balancing properties. It helps to alleviate stress, and anxiety, and promote a sense of inner peace.

Selenite

A translucent crystal is known for its purifying and calming properties. Selenite can create a serene atmosphere and promote mental clarity.

Aventurine

Known as a stone of prosperity and tranquillity, aventurine has a soothing energy that helps to calm the mind and enhance relaxation.

Howlite

This white crystal with grey veining is known for its calming properties. It helps to reduce stress and promote a peaceful environment.

Aquamarine

A light blue crystal associated with the soothing energies of the ocean. Aquamarine promotes calmness, clarity, and relaxation.

How to Use Crystal Ornaments for Calmness

  • Placement: Display crystal ornaments in areas where you seek calmness, such as bedrooms, meditation spaces, or living rooms.
  • Clusters: Create clusters of different calming crystals to amplify their calming energies.
  • Intentions: Set intentions or affirmations while placing the crystals to enhance their calming effects.
  • Cleansing: Regularly cleanse your crystals to maintain their energy and effectiveness. 

By incorporating these calming crystal ornaments into your living space, you can create a tranquil environment that promotes relaxation and well-being.

How to Create a Glass Ornament Display Shelf

Creating a glass ornament display shelf is a great way to showcase your collection while adding a decorative element to your living space. Here’s a step-by-step guide to creating your own glass ornament display shelf:

Materials Needed:

  • Wooden Shelf: Choose a sturdy wooden shelf that complements your decor and is wide enough to accommodate your ornaments.
  • Glass Brackets: These will hold the glass shelves in place. You can find them at hardware stores or online.
  • Glass Shelves: Opt for tempered glass shelves that are strong enough to hold your ornaments. Measure the dimensions based on your shelf and the size of your ornaments.
  • Level: To ensure your shelf is straight and level when mounted.
  • Screws and Wall Anchors: To secure the shelf to the wall safely.
  • Ornaments: Gather your glass ornaments or figurines that you want to display.

Steps to Create the Shelf:

Measure and Plan:

Decide where you want to mount the shelf. Measure the space to determine the length and depth of the shelf. Also, decide how many glass shelves you want to install.

Consider the size and weight of your ornaments to determine the spacing between shelves.

Prepare the Wooden Shelf:

If necessary, sand and paint or stain the wooden shelf to match your decor. Let it dry completely before proceeding.

Mount the Glass Brackets:

Using a level, mark where you want to place the glass brackets on the wall. Ensure they are evenly spaced and level.

Drill pilot holes into the wall for the screws and insert wall anchors if needed. Attach the glass brackets securely to the wall.

Install the Glass Shelves:

Place the glass shelves onto the glass brackets. Ensure they fit securely and are level. Adjust the brackets if necessary to achieve a level surface.

Place heavier ornaments towards the bottom for stability and lighter ones towards the top.

Arrange Your Ornaments:

Carefully arrange your glass ornaments on the shelves. Consider grouping them by color, size, or theme for a cohesive look.

Leave enough space between ornaments to allow each piece to stand out.

Secure the Shelf:

Once you’re satisfied with the arrangement, ensure the shelf is securely attached to the wall. Double-check that all screws are tight and the shelf is stable.

Add Decorative Touches:

Consider adding LED strip lights underneath the shelves for a dramatic effect, especially if displaying in darker corners.

Place a small plant, framed photos, or other decorative items alongside your ornaments to enhance the display.

Maintenance:

Regularly dust the ornaments and shelves to keep them clean and sparkling.

    • Check the shelf and brackets periodically to ensure they remain secure and stable.

Creating a glass ornament display shelf allows you to showcase your collection in a stylish and organized manner. Whether in a living room, hallway, or bedroom, it adds a personalized touch to your home decor while highlighting the beauty of your glass ornaments.

The Benefits of Crystal Ornaments in Kitchens

Using crystal ornaments in kitchens can bring both aesthetic appeal and practical benefits to the space. Here are some advantages of incorporating crystal ornaments in kitchen decor:

Enhanced Aesthetic Appeal:

Crystal ornaments add a touch of elegance and luxury to kitchen spaces. Their clear, reflective surfaces can catch and refract light, creating beautiful sparkling effects that enhance the overall ambiance of the kitchen.

Light Reflection and Brightening:

Due to their reflective nature, crystal ornaments can help brighten up darker corners of the kitchen by reflecting natural or artificial light. This can make the kitchen feel more open and spacious.

Versatile Decor Options:

Crystal ornaments come in various shapes, sizes, and designs, offering versatility in decor options. They can be used as standalone decorative pieces or incorporated into other kitchen decor such as chandeliers, pendant lights, or cabinet knobs.

Easy Maintenance:

Crystal ornaments are generally easy to maintain. They can be wiped clean with a soft cloth to remove dust or fingerprints, making them suitable for high-traffic areas like kitchens where cleanliness is essential.

Durability and Longevity:

High-quality crystal ornaments are durable and resistant to scratches, ensuring they maintain their clarity and shine over time. This durability makes them a worthwhile investment for long-term decor.

Symbolic and Traditional Significance:

Crystals have symbolic meanings in many cultures, often associated with purity, clarity, and positive energy. Incorporating crystal ornaments in the kitchen can bring a sense of harmony and positivity to the space.

Gifts and Sentimental Value:

Crystal ornaments can also hold sentimental value or be cherished gifts. Displaying them in the kitchen adds a personal touch and can serve as a reminder of special occasions or memories associated with the ornaments.

Focal Point and Conversation Starter:

Particularly in kitchen designs that incorporate open shelves or glass-front cabinets, crystal ornaments can serve as focal points and conversation starters. They draw attention and add a sophisticated touch to the overall kitchen decor.

Complementing Modern or Traditional Styles:

Whether your kitchen decor is modern or traditional, crystal ornaments can complement various styles. They blend seamlessly with contemporary kitchen designs as well as classic or vintage-inspired themes.

Festive Decor Options:

During festive seasons or special occasions, crystal ornaments can be easily incorporated into kitchen decor themes. They add a festive sparkle and elegance, enhancing the celebratory atmosphere.

In conclusion, using crystal ornaments in kitchens offers not only aesthetic benefits but also practical advantages such as easy maintenance, durability, and versatility in decor options. Whether used sparingly as accents or more prominently as part of the kitchen’s design scheme, crystal ornaments can elevate the overall look and feel of the space, making it more inviting and visually appealing.

How to Create a Glass Ornament Wind Chime

Creating a glass ornament wind chime can be a beautiful and soothing addition to your outdoor or indoor space. Here’s a step-by-step guide on how to create one:

Materials Needed:

  1. Glass Ornaments: Choose a variety of glass ornaments in different shapes, sizes, and colors. You can use both clear and colored ornaments for visual interest.
  2. String or Fishing Line: Strong, durable string or fishing line to hang the ornaments. Make sure it can withstand outdoor conditions if you plan to hang the wind chime outside.
  3. Metal Ring or Hoop: A metal ring or hoop to serve as the base from which to hang the strings of ornaments. This could be a metal craft ring or a large metal washer.
  4. Beads or Crystals (Optional): Small beads or crystals to add sparkle and enhance the visual appeal of the wind chime.
  5. Scissors
  6. Hot Glue Gun (Optional): To secure knots or add decorative elements.

Step-by-Step Instructions:

  1. Prepare the Ornaments:
    • Gather your glass ornaments and remove any hooks or strings attached to them. Ensure they are clean and free of dust or debris.
  2. Cut Strings to Length:
    • Cut several lengths of string or fishing line, each approximately 12-18 inches long. The exact length will depend on how low you want your ornaments to hang.
  3. Attach Ornaments to Strings:
    • Tie one end of each string securely around the neck or top loop of an ornament. You can double knot the string to ensure it holds.
  4. Add Beads or Crystals (Optional):
    • If you want to add beads or crystals between the ornaments for extra decoration, thread them onto the string before tying the next ornament.
  5. Attach Strings to Metal Ring:
    • Once all ornaments are tied to strings, gather the loose ends of the strings together.
    • Tie each string securely to the metal ring or hoop. Space them evenly around the ring to create a balanced look.
  6. Check Balance and Length:
    • Before finalizing the knots, hold up the wind chime to check the balance and adjust the lengths of the strings as needed to create a pleasing arrangement.
  7. Secure Knots (Optional):
    • If desired, use a hot glue gun to secure the knots where the strings are tied to the metal ring. This will provide extra durability, especially if the wind chime will be exposed to outdoor elements.
  8. Hang and Enjoy:
    • Find a suitable place to hang your glass ornament wind chime. It could be on a porch, in a garden, or near a window where it can catch the light and create soothing sounds when the wind blows.

Tips:

  • Choose a Variety: Mix and match different sizes, shapes, and colors of glass ornaments to create visual interest and enhance the chime’s aesthetic appeal.
  • Consider Outdoor Use: If you plan to hang the wind chime outside, ensure that all materials used are weather-resistant and durable.
  • Personalize: Add personal touches such as using ornaments with sentimental value or incorporating favorite colors to make the wind chime uniquely yours.

Creating a glass ornament wind chime is not only a creative project but also a delightful way to add charm and tranquility to your living space.

Benefits of Crystal Ornaments in Greenhouses

Crystal ornaments can bring several benefits when used in greenhouses. Here are a few advantages to consider:

Light refraction:

The presence of crystal ornaments in a greenhouse can enhance the play of light. As sunlight passes through these ornaments, it refracts, creating beautiful dispersed patterns, colors, and reflections within the greenhouse. This adds visual interest and can create a peaceful and serene atmosphere for both plants and visitors.

Energy redistribution:

Crystals have been associated with the ability to redirect and balance energy. Placing crystal ornaments strategically in a greenhouse might promote a harmonious energy flow within the space. This positive energy can potentially influence the overall plant growth and health.

Aesthetics and relaxation:

Crystal ornaments can serve as captivating decorative elements within a greenhouse, contributing to its overall beauty. Their enchanting presence can create a calm and inviting ambiance, making the greenhouse an enjoyable space for relaxation and reflection.

Mindfulness and focus:

The presence of crystal ornaments can serve as a focal point or object of contemplation. For those practicing mindfulness or meditation in the greenhouse, crystals can help in attaining a state of mental clarity and focus.

Symbolic and spiritual significance:

Crystal Ornaments in Greenhouses have long been associated with various symbolic meanings and spiritual properties. For individuals who ascribe to certain beliefs or traditions, the use of crystal ornaments in a greenhouse might hold personal significance and contribute to a sense of spiritual connection between nature and oneself.

It is worth noting that scientific evidence supporting the direct impact of crystals on plant growth or greenhouse functioning is limited. However, their use can provide aesthetic and experiential benefits that contribute to a pleasant and tranquil greenhouse environment. If you choose to incorporate crystal ornaments, ensure that they are clean and properly positioned to prevent any potential hazards or disturbances to the plants.